How to Charge Meta Quest 2 Controllers (Easy & Ultimate Guide!)
Meta Quest 2 is a leading VR headset with standalone functionality, immersive visuals and audio, all packed in a lightweight ergonomic design. But no matter how great these features are, a common problem among Quest 2 users is how to keep the controller charged and ready for intense gaming and movie marathons.
So, how do I charge Oculus Quest 2 controllers? This guide provides the answers, helping you maintain an uninterrupted, immersive experience in your virtual world.

Image from Meta Store
How to Charge Meta Quest 2 Controllers
Replacing Batteries
First of all, let's talk about replacing the batteries. User are often unsure about how exactly to replace the battery in the Meta Quest 2 controller. Here's a clear guide:
1. Find the Battery Compartment: You’ll first need to find the battery compartment on the opposite side of the trigger button on the controller grip. You will recognize it by the small eject icon at the location.
2. Open the cover: Just push the cover with your thumb in the direction the arrow is pointing to, away from you. This will release the lock on the cover and open the battery compartment.
3. Remove the Old batteries: It is important to do this step carefully because old batteries may leak if not handled appropriately. Hand gloves or a cloth should be used if you see signs of battery leakage. Once removed, dispose of the battery properly. This recycling process is important as old batteries contain injurious chemicals that have the potential to negatively impact the environment.
4. Insert New Batteries: When inserting new AA batteries, always check the polarity markings. There is a positive and negative terminal on a battery; ensure the terminals correspond to the marking found inside the battery compartment.
Using the Meta Quest Pro Charging Dock
AA batteries aren’t for everyone. For those seeking a convenient way to keep their devices charged, the Meta Quest Pro Charging Dock is a great alternative. Originally designed for Meta Quest Pro controllers, you can still use it to charge your Meta Quest 2 and Quest 3 controllers without any hassle:
1. Prepare the Charging Dock: Position the dock on a hard, flat surface away from heat, direct sunlight, and vibration because these three factors can cause the dock and the product not to align properly or even get damaged.
2. Install the Rechargeable Batteries: Slide the cover off to open it and gain access to the battery compartment. Take out any AA batteries and set them aside to be recycled or used for something else. Insert the rechargeable batteries into its charging dock with the + and – ends matching the + and – markings inside the battery compartment.
3. Install the dock-compatible battery covers: Take off the original battery covers and install the specially designed covers that come with the dock. The cover and dock have been engineered to work together, to help enable charging compatibility.
4. Set the Controllers on the Dock: Rest each controller exactly where it should sit on the dock. Ensure that the contact points on the battery covers are aligned with the contact points on the dock. Apply light pressure until you feel the connection is tight and secure.
5. Check Charging Indicators on the dock:
● Light blinking: The device is charging.
● Solid green light: The controller is fully charged.
6. Charge the Headset (Optional): If your charging dock supports headset charging, place the Meta Quest Pro headset where it goes. Ensure that the charging contacts of the headset are aligned with the connectors of the dock so that both get charged.
7. Take out the Device Once Fully Charged: When you see the green LED light, it indicates that you should take out your controller and headset from the dock. This habit will help extend your devices’ life spans.

Image from Meta Quest YouTube Channel
How to Check Oculus Quest 2 Controller Battery Level
It is important to know the battery status of your controllers so as to avoid future interruptions during your gameplay. Here is How to Tell if a Quest 2 Controller Is Charging.
1. Use the Meta Quest App
Meta Quest has an app that can be downloaded from iOS and Android stores. This app enables you to keep an eye on the power levels of your headset and your controllers:
● Once downloaded, open the Meta Quest app.
● Ensure your headset is paired with the app; once connected, the app will display Meta Quest 2 connected with a green tick beside it.
● Tap on the connected device name (Meta Quest 3) in the app
● Navigate to the battery section on your left.
● Tap on the battery section to see the battery status of your headset, left controller, and right controller.

Image from https://mixedrealitynow.com/
2. Observe the LED Status
Check the LED on the controller or charging dock. The color of the LED is really informative:
● Amber: This colour means your controllers or headset is actively charging.
● Green: This colour means your devices are charged and ready for use.
● Solid Red: This Indicates that the batteries have less than 3% charge.
● Flashing Red: This happens during use to signal that the battery is about to die.
3. Manual Check
If you are using disposable batteries, you have to manually check them frequently. Replace with fresh batteries if controllers are not responsive.
FAQ about Meta Quest 2 charging
1. How does Meta Quest 2 power its controllers?
Quest 2 controllers are powered by AA batteries. Those batteries can be disposable or rechargeable, it all depends on the preference of the user.
2. Can the batteries bundled with Quest 2 be recharged?
The original batteries aren’t. But for a more environmentally friendly solution, use rechargeable batteries instead.
3. How long does Meta Quest 2 take to charge?
Charging times can vary, but 2–3 hours is the usual time that the Meta Quest Pro Charging Dock takes to charge controllers. That does not mean they always take this long, though. The range allows for varying conditions of charging and controller types.
4. Why is my Oculus controller not charging?
The common issues include:
- Charging contacts not aligned correctly
- Faulty charging dock or cable
- Dust buildup on charging contacts
Solution: Make sure everything is properly aligned, that there’s no corrosion or oxidation on the contacts, and that the charging dock or cable is working correctly.
5. How long do Meta Quest 2 controllers last?
A Meta Quest controller with a fresh set of AA batteries can last 20–30 hours. However, some factors, such as how often you use the controllers, the type of batteries, and environmental conditions you have, can reduce the lifespan of the controllers.
6. Are there any accessories to enhance charging convenience?
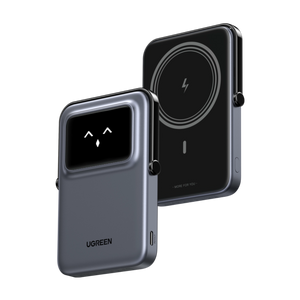
Accessories like power banks, charging docks, or even USB-enabled chargers are available to make the charging process more convenient.
